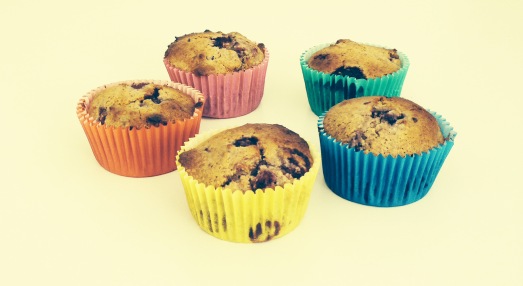
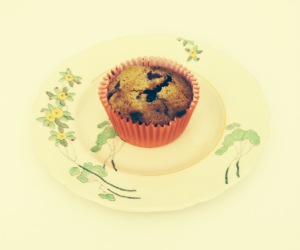
Gluten Free Raspberry Muffins

raspberry muffins

raspberry muffins


Hi everyone! I haven’t posted in a little while, but here is the most DELICIOUS muffins I have ever tasted!! And the good news is, they are free of grain and sugar! Hurrah!

Here is the recipe:

1 cup raw almonds

1 cup roasted almonds (or 2 cups of 1 type if you don’t have both)

Add almonds to your food processor and whizz them into a meal. It is actually better if you don’t get them quite as fine as store bought almond meal. OR feel free to just go ahead and use store bought almond meal! But it tastes so much better when you make your own.

2 free range eggs

1/4 cup butter, melted (or coconut oil if you’re dairy free)

1 tbls Vanilla essence (or extract, but this is not sugar free)

1 tsp organic apple cider vinegar

1/2 tsp bi-carb soda

1/4 cup rice malt syrup

1 cup fresh or frozen raspberries (or you can use any berries you like!)

Preheat your oven to 180C

Step 1. combine the bi-carb & apple cider vinegar

Step 2. combine all ingredients except raspberries (yep add the bi-carb mix) by hand using a wooden spoon

Step 3. gently fold in the raspberries

Step 4. dollop mixture into muffin tin (I made 10). Use muffin liners if you have them, they make life so much easier. Otherwise grease your tins really well with butter or coconut oil.

Bake for 15 – 20 mins until springy. Remove from oven and cool until just warm. If you can wait!!

These muffins are super delicious. Serve with cream or cut in half and spread with a generous serve of organic butter. Enjoy!


Gluten & Dairy Free Chocolate Cookies with Peanut Butter Cream

Image

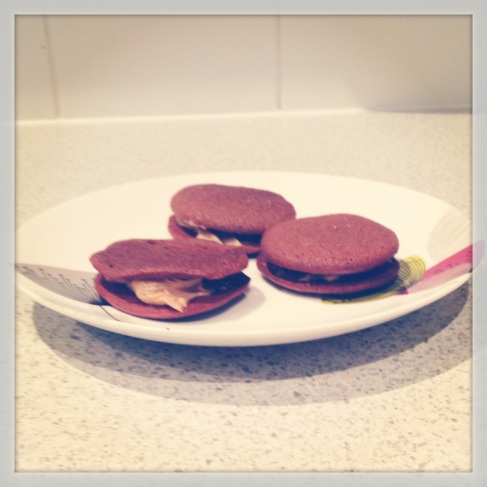
This is a recipe you can indulge in without feeling too guilty. These cookies are free from gluten, dairy and sugar. And they are also super tasty. Hoorah!

I wish my photography skills were better..!

Here’s the recipe:

Cookies

Preheat the oven to 175.C

In a mixer bowl, throw in 1/3 cup of coconut oil and 1/3 cup rice malt syrup. Beat until it resembles a thick cake batter.

Keep the beaters going and add 2 eggs slowly

Now add:

1 tsp vanilla extract

1/4 cup raw cacao powder (I use loving earth)

1/4 tsp baking powder

a pinch of himalayan pink salt (or salt other than table salt)

keep beating until all ingredients are combined.

Stir in a 1/4 cup of raw cacao nibs (for some crunch) or even more if you like. (again, I use loving earth)

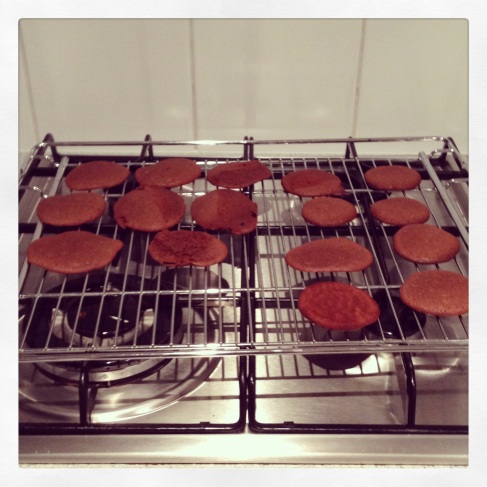
Dollop the mixture onto a baking sheet lined with baking paper. Cook for 10 minutes.

Cool on a wire rack.

Image

Peanut Butter Cream

1/4 cup organic peanut butter

2 tablespoons almond milk

1 tablespoon of rice malt syrup (or as much as you like, depending on how sweet you’d like it to be).

mix all ingredients together until you have a lovely thick ‘icing’ type texture. Add more almond milk if you need to.

Make a sandwich with the cookies and peanut butter cream.

Try and stop at one. Impossible!


Vegan & Gluten Free Chocolate Brownie

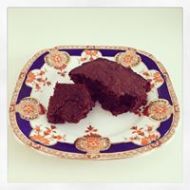
ImageI was recently given the task of creating a ‘gluten free’ and ‘vegan’ recipe for our upcoming ‘not’ Christmas party (we work in retail and are too buy when it is actually Xmas).

So after a quick Google search I found a recipe from The Gluten Free Vegan (not endorsed) and OH MY am I glad I found this website. Total awesomeness. I have altered the recipe slightly as I chose not to use the chia seeds & I use Raw Cacao from Loving Earth

I also used 2 small organic bananas that were not over ripe, but perfect eating condition.

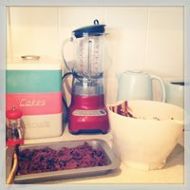
A little tip: Make sure the cherries are thawed before adding them to the mixture, otherwise the coconut oil will solidify and not spread evenly in the baking dish.

ImageFor a non vegan, this is SERIOUSLY good and I will definitely be making it again. For those of you wanting the recipe from The Gluten Free Vegan either click on the link or check it out below: (I deleted the chia seeds)

Author: Megan – The Gluten Free Vegan
Recipe type: Desserts
Serves: 12 pieces
Ingredients
  • 1 cup finely ground gluten-free oat flour
  • ¼ cup coconut flour
  • ⅔ cup unsweetened cocoa powder
  • ½ teaspoon baking powder
  • ⅛ teaspoon fine sea salt
  • 6 tablespoons coconut oil
  • 1 cup organic coconut sugar
  • 2 teaspoons finely ground coffee
  • 1 very ripe banana, mashed
  • 2 tablespoons unsweetened non-dairy milk
  • 2 teaspoons vanilla extract
  • ½ cup high quality dark chocolate, cut into small pieces
  • ¾ cup frozen pitted cherries, chopped
Instructions
  1. Preheat oven to 175C Grease an 8×8 baking dish.
  2. In a medium bowl sift together oat flour, coconut flour, cocoa powder, baking powder and salt.
  3. In the work bowl of a mixer fitted with a beater attachment (or a large bowl if mixing with a hand mixer) combine coconut oil, coconut sugar and coffee grounds. Mix well on high until well combined.
  4. Add ripe banana and mix on high until fully combined.
  5. Add non-dairy milk, (I used unsweetened Almond milk) vanilla and dark chocolate. Mix.
  6. Add the dry ingredients to the wet ingredients and mix until combined. The batter will be quite stiff.
  7. Fold in chopped cherries until evenly distributed.
  8. Turn out mixture into greased baking pan. Spread evenly and press down firmly.
  9. Bake in preheated oven for 25-30 minutes. Let sit 30 minutes before cutting and serving.


Almost Healthy Chocolate Cake

Chocolate Cake, healthy style..?

Today I decided to do what I always said I could do – make a cake without a recipe. And not just that, but with ingredients I haven’t used together before.

I woke up this morning and decided today would be a chocolate cake kind of day! However, I wanted something a little guilt free. Just a little.

Here is what happened…

I open the pantry door. Raw Cacao? Yep. Self raising flour? Yes. Agave syrup? That should work. And I might use coconut oil instead of butter.

Here is the recipe:

Pre heat oven to 150 degrees Celsius

In my trusty Kenwood mixing bowl I put:

  •  1.5 cups SR Flour
  • ½  a cup of raw cacao powder
  • ¼ cup Agave syrup (nectar)
  • 2 eggs lightly whisked
  • 1/4 cup coconut oil
  • ¾ cup of milk

Mix all together to make a batter and pour into a cake tin.

Bake for 25 minutes or until a skewer comes out clean.

My thoughts? Not quite sweet enough. You can probably get away with adding another ¼ cup of agave nectar. I was also concerned the cake didn’t rise enough… However… it was beautiful! The cake has a lovely, dense mud cake type texture! A winner as far as I am concerned!!

This is the very first time I have tried baking without anything to guide me and I feel very proud that this turned out exceptionally well 🙂

Delicious!

And it is almost healthy!

All Time Favourite Pizza

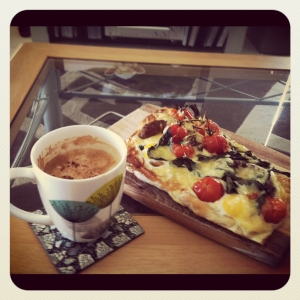
This is probably the best pizza I have ever made. There are countless pizza dough recipes available, and you probably already have your favourite. This is mine. It is often on the brekky menu the morning after an evening full of good wine.

The dough.

After lots and LOTS of experimentation, I have found that using a combination of (organic if possible) Unbleached white plain flour, wholemeal spelt and white rice flour will give you the most delicious base.

Here is how I put it together.

In 1 cup of warm water, add 2 tsps of dry yeast & 1 tsp raw sugar and stir in with a fork. Let it sit in a warm place for 5mins or so, until it foams.

In a large bowl (I use the plastic bowl from my trusty Kenwood mix master) add 1.5 cups unbleached flour and half a cup of wholemeal spelt. Throw in a bit of salt, about a teaspoon.  Give it a stir to combine everything.

Make a little well in the dry ingredients and pour in yeast mixture. Stir to combine and then let the mix master do all the kneading if you have one. If not, roll up your sleeves and knead the dough for 10 minutes, adding extra unbleached flour if you need to.

Once the dough is lovely and bouncy when you push you finger into it, wipe out the plastic bowl with a little oil so it doesn’t stick as it rises. Cover with cling wrap or a damp tea towel and leave for at least 1 hour. (I have left it overnight before!)

Once the dough has doubled in size, knock it back on a lightly floured surface. This is when I use the rice flour, it helps to give the base a lovely texture. Separate into 4 equal pieces and roll each out into a round shape, nice and thin. You now have 4 pizza bases! I like to have my oven on to 200 degrees Celsius. (I have to do 2 pizzas at a time because I have a smallish oven) Place the pizza bases in the oven and ‘pre cook’ for about 5 minutes. Take out of the oven and spread with a tomato sauce (oven roasted tomatoes with garlic all crushed up makes a delicious sauce). THe ingredients I use for my brekky pizza is as follows:

(There are no rules for quantity, just as much or a little as you like!)

  • Beef sausages
  • Oven roasted cherry tomatoes
  • Gruyere cheese, grated
  • Finely chopped onion
  • cracked eggs
  • fresh basil
  • a good sprinkle of freshly ground black pepper if you love it as much as I do, and a sprinkle of dried chilli.

Place in the oven for about 10 minutes or until the base starts to brown and the cheese is melted.

Enjoy!!

This is a wonderful alternative to store bought pizzas, and it is far more delicious!!

Best pizza Ever

Our Crash to Suburbia

Our beautiful Muscovy Duck, Florence.

Now

Concrete jungle. The sound of trains and buses hurriedly piling in robots, on their way to mechanical day jobs. It feels as though we have arrived in Lego Land, the houses are all the same. Fake grass for as far as the eye can see and it feels like plastic bags scrunching underfoot.

Supermarkets jam packed with people making purchase for their boxed, wrapped and canned goods. Usually the more processing the ‘food’ has been through the better. Sugary snacks, frozen dinners, fluffy white bread and stuff to spread on it which has more ingredients than my bottle of household cleaner.

Then

Gritty dirt beneath my feet. Moist, cool foggy mist hitting my face like a slap as I slide open the glass door. Fresh and cold enters my nostrils and filling my lungs as I look around me. There is snow on the mountain today.

I dip my hands into the soil as I decide what will be for dinner tonight. It is cold and damp and my duck is watching me in the hope I will uncover a nice surprise. She scoots over, tail flapping as she catches sight of something wriggling under an overturned stone. Yum breakfast!

I get up and decide to let the chooks out for a play this morning. There are plenty of eggs today, good girls! We all know what happens when you stop pulling your weight!

Now

I open the fridge. How long do eggs keep? I am not used to buying and storing them after they have been stored for whoever knows how long.

Ahh food. What happened?

I often think back to the days of my grandparents and when they were young. Obviously I only have their memories to rely upon and as a child loved to hear about how they ate as they grew up.

I had a mixed bag of influence in my younger days. My mother was born to a conservative couple who went to church on a Sunday, did everything by the book and ate chops and 3 veg. My grandmother tells stories of her life spent on Bruny Island, gutting locally caught fish from the jetty. Gutting fish and chopping the heads off chickens were all in a days work for the average woman then. The old wooden jetty is no longer there. Instead it has been replaced by a steel contraption purpose built for tourist boats and catamarans.

My father’s father migrated from the small country of Albania and relied upon the good of the land and the fruit of his labour to ensure food was on the table each night. I love the story of him being refused entry to the Royal Hobart show after a time as he was ‘too good’ and other food vans were kicking up a stink. I don’t know why they were so upset; he usually sold out by 11am!

I also love that he brought a whole new world of food to my mother. You can imagine the shock value of a pickled olive after the bland boiled meals she’d been exposed to in her 16 whole years of life before meeting my father. My father’s mother was very poor and badly treated by her aunt who brought her up along with her brothers and sisters. Food was rare in her early days and as a result, delighted in the act of force feeding. Although I do laugh that once, not long after my grandparents were married, my grandfather went to check on a lovely wheel of maturing cheese in the shed. Only it had disappeared! My grandmother had thrown it in the rubbish because she thought the mould on it meant it had ‘gone off’! I squealed with laughter at her impersonation of him trying to contain his anger and disappointment. I never got the chance to meet my grandfather. He died when dad was only 21, the same year he married my mother. I arrived 5 years later.

I would once a week walk to Nan’s house after I had finished school to be greeted with a plate full of tomato sandwiches with plenty of black pepper and still cold from the fridge. Precisely 90 minutes later and during an episode of whatever game show had Larry Emdur back then, dinner would be served. Generally a plate of meat, marinated in something alcoholic and vegetables done in different ways with gravy or white sauce. Half way through my meal I would have dessert plonked down in front of me and I would look at it greedily, praying after I had eaten all of my dinner (as was expected) that I wouldn’t be too full to enjoy it. Usually I was too full but it didn’t stop me from eating it. There were usually 3 types of desserts on offer at Nan’s house although not all at the same time. However, should that have been the case I would not have been surprised. The 3 desserts I came to expect were: Chocolate Mousse with candied oranges, Jelly with custard and cream (the jelly always had a thick layer of ‘lollified’ sugar on the base) or stewed peaches and ice-cream. It was great. I loved my afternoons with Nan. This is where my passion for food began.

This blog is a tribute to food. From my past in Tasmania, my travels and my life here in Perth.

I want this blog to help me connect with like minded people who can help me with our ‘eat local’ mentality. It is so difficult when you move to a new place to find people near by who might be willing to trade a cake for some fresh eggs! And maybe share a secret or two from their kitchen 🙂